I have had a great long weekend, playing with all the new set from Stampin' Up! I thought I would put the cards into section so you can see different techniques. I will be back soon with some more. Some of these cards were inspired by Dawn a talented lady I have just found on the internet. So why not try some of these your self.
PUNCHES


 Have fun with your punches, you will be amazed what you can make.
 REVERSE MASKING
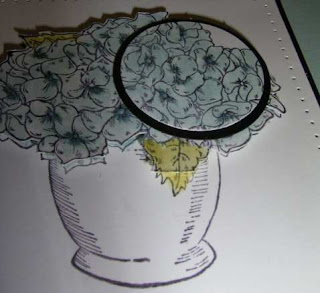
 This is so easy, all you need to do is cut out a circle template to go over you card, then choose ink colour and sponge inside the template, before you remove the template stamp you image to fit into the circle, when you lift it off you can see your circle of colour, stamp words over the circle.
Sorry the photos are not the best.
 This one is used the same colour cardstock and ink.
CRAYON RESIST

 see the white lines, this is where the crayon was.
 For crayon resist you need gloss card or it can be done on normal white, but when it comes to doing the sponging it slides better on gloss and gives a glossy effect. using you white crayon mark parts of you image, this will not have colour on it. Sponge you inks over, wipe over with a tissue to get rid of any crayon and ink sitting on the top of cardstock
MARKER PENS

 These cards are done using the Stampin' Up! Marker pens. So quick and easy to use.
LOTS OF CIRCLES
This card is called lots of circles, I cased it from Dawn, she has some great tutorials.

 Gloss card
Brayer
3 ink colours - Regal Rose, Celery & Pretty in Pink
Black stazon
Circle punches
2way glue stick
Stamp set of choice
Punch out about 5 to 6 different circles, Put a dot of glue on and let get tacky. Stamp flowers in Regal Rose, but stamp off first, this gives a lighter effect. Stamp leaf in Celery, Place circles randomly over card, and ink brayer up with Pretty in Pink, keep moving card around so the ink goes in between the spaces around the circle.
SHADOW EFFECT
 Stamp with white or light colour first, then using your Stamp-A-Ma-Jig line up your image just off to one side to give you the shadow effect, then stamp in black or darker colour to get the effect below.
CHALKING
Here I have used a cotton ball to colour in the section I want coloured. This card also features the Spotlight technique.
This is called Chalk Poppin', you use your Versa Mark pad, stamp image then rub cotton ball into you chalk and use different colours to colour your image.
CHALK LINES

 Chalks
Black ink
Cotton balls
Pencil with rubber on the end
ruler
Stamp flowers, use cotton balls to add colours, when finished use ruler and rub a line till you are happy with how it looks.
BLEACHING

These are the 6 new incolours using the bleaching technique, then the grass stamped with ink over the top.
BLEEDING MARKER PENS
 Watercolour paper
Stazon ink
Stamp set
Marker of your choice
Water spritz
Stamp flower with stazon, Colour with thick tip of marker, Spritz with water and let it run over
Paper, heat set or set aside to dry.


